Saturday, December 31, 2011

Blue Days

We're moving forward and finally reached the blue section of the deployment chain. I'm so happy to be into a different color knowing that it's closer to us being reunited.

I want to wish everyone a fun, happy, and safe New Years! Unfortunately my New Years kiss at midnight will be off by half a year, but that's alright because the longer the waiting, the sweeter the kiss.

Saturday, December 24, 2011

Hi


  • Classes have been finished for a little over 2 weeks. I got A's in my courses, still 4.0 GPA! 
  • I'm enrolled for two other courses for the Spring semester
  • Matt is in Singapore currently and he's enjoying being on land and seeing new places
This Christmas is our first Christmas apart in 7 years since being together. It definitely doesn't feel the same without him and it's my first spending it alone. I'm glad I have a couple craft projects in mind! I hope that everyone enjoys their Christmas being spent with family and friends. 

Saturday, December 17, 2011

Paper Bag Stockings

This final project I made in my husband's Christmas package was very simple to do.

What you need:
Brown paper bag
Scissors
Tape
Googly eyes
Hot glue gun/glue
Buttons
Candy Canes
Stocking Stuffers/candy

What you do:
Take the brown paper bag and cut 2 slits in the middle of the bag about same distance apart.

Insert the candy cane through the hole and then stand the paper bag up so you can tape the candy cane down in place so it doesn't move around. If you like, you can even hot glue the candy cane down for this part instead of tape.
Once that's finished, just put some items in there just as you would a stocking. Fold the bag over and tape it closed.
Reindeer stockings, too cute.
If you missed the other holiday craft posts, they are here, here, here, and here.

Thursday, December 15, 2011

Mini Tree Skirt

Today's post is all about making the Christmas tree a bit fancier by adding a tree skirt. In my hubby's care package, I added in a small tree, lights, decorations (Tree and non-tree related), tree skirt, a star, and mini candy canes so that their work center could celebrate the season right! The stores did sell tree skirts,  but they were $5-7 and since I figured that it's cheaper to make and pretty simple, I took a trip to Joann's.

What you need:
9x12 felt square
Cute trim/Ric-Rac
Hot glue gun/hot glue sticks
Scissors
Marker

What you do:
First take your felt square and draw a circle as big or small you feel like it should be to match the size of your mini Christmas tree.
Next step, cut along the line of where you drew your circle. Then make a slit almost halfway through the middle of the circle. This slit is so you can wrap it around the tree.
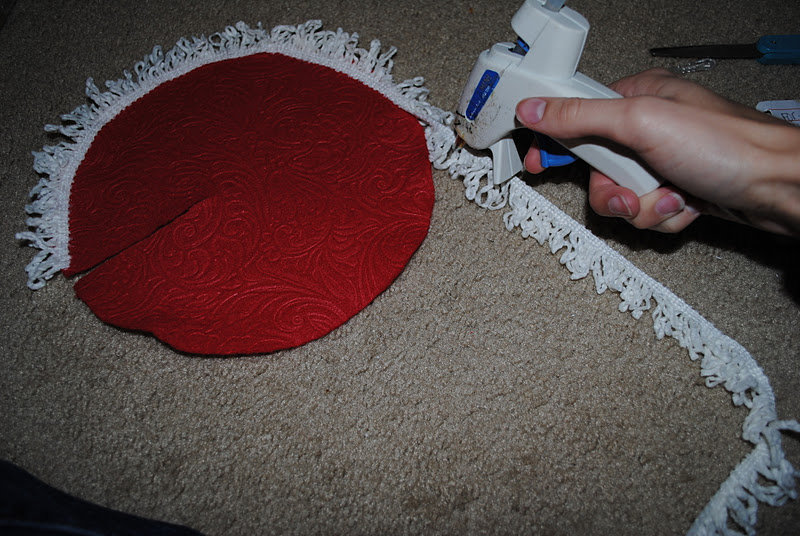
The circle doesn't have to be exactly perfect because we are adding on cute ric-rac to make it more festive, but you want it pretty even. Now, start hot gluing on the ric-rac along the edge of the border starting from one end of the slit until you reach the other side.

That's it! Isn't is so pretty? And just because, I added a few angle pictures of how it looks with a mini Christmas tree.


(Don't mind the background mess, It's the only way I can really work on Matt's care packages lol)

Tuesday, December 13, 2011

Frosty The Snowman

If you guessed this post has something to do about a snowman from reading the title, then you are correct! This is the continuation of crafts made for my hubby's care package for Christmas.

Now, if you love chocolate, snowmen, and quick/easy crafts, then this is one project for you to do!

What you will need:
Socks (you'll see why)
Ribbon
Tape
White paper; computer paper is best
Hot glue gun and hot glue sticks
Buttons
Crayons or markers
Hershey chocolate bars

What you do:
The first step to this project, is cutting the white paper to the correct length of the Hershey chocolate bar.
Lay the paper down and place the chocolate bar in the middle of the paper. Fold over half the paper and tape it to the chocolate bar. Then fold over the other paper and tape that down.


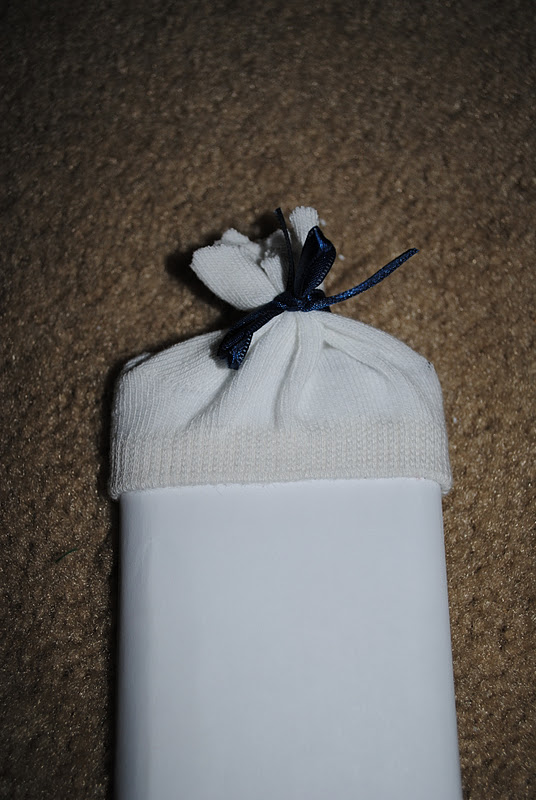
Once you have those steps completed, go ahead and now cut a piece off from the sock by starting on the ankle part of the sock, then working your way down. You can cut it to your desired length, but to show you how much I cut off, you can see from the picture below

Place the cut part of the sock on the top part of the bar and hot glue the bottom portion of the sock to the paper that way it doesn't slip off. Bunch up the top part of the sock and tie a pretty bow around it. It's already looking much more than a snowman!
Draw on the eyes, nose, and mouth. Then hot glue on buttons. (you can use 2, 3, 4 buttons) That's it. You have a cute chocolate snowman!